Friday, February 26, 2021

M4 Meeting the client brief

The brief 

The brief for creating this unit was to create a music video for either an established artist or local band. I chose the song 'Solstice' by the multimedia artist Yeek. More detail on why I chose this song/artist and why I created the video in the way I did can be found in my M3 Codes and conventions post. This music video could be narrative, performance or concept based and could include live action and/or graphic elements. It must run for the whole duration of the song and be fitting to the artist's TA. All content must be original and produced by me. 

How did I meet the brief?

To ensure that I met the brief I chose a fairly well established artist as opposed to a local band as this meant that I could operate on my own schedule and wasn't inconveniencing anyone with school hours etc. Furthermore due to COVID, making a music video for a local band would've created a lot of issues especially because I would want the client to love it and use it. Following the brief, my music video was a concept based video with a slight narrative and also featured some live action and graphic elements (e.g logo.) In addition I made sure that I collected a sufficient amount of footage to ensure that the visuals covered the entire duration of the song as this was a key part of the brief and music videos are often ineffective without this. 

We were also asked to make sure that our video was suitable for the artist's target audience. In the planning process I outlined that the Yeek's target demographic were on the younger side (Gen Z). It is typically harder to retain a younger audience's attention so I tried to feature interesting visuals and fast paced cuts in my video to achieve this. In addition, this genre is typically associated with the reformers and strugglers of the C1, C2 and D classes which I tried to encompass through the use of emotive framing and gloomy shots. Furthermore, I purposefully left the narrative quite vague as this meant that the video was still appealing to the explorer psychographic which I outlined as a factor of the TA in my P1 Proposal 

Overall I feel that I was successful in meeting the project brief as I adhered to all of the requirements outlined. This meant creating a music video for an established artist which covered the entire duration of the audio file which I made sure was capable by collecting excess footage. In addition this video had to be either a narrative, performance or concept style video which supported the artist's iconography and TA. I think that I supported both of these factors, just not as well as I had planned. I'll be evaluating how well the video went to plan later on in this blog post. 

Any issues/risks and how they were overcome (non covid)

Because the concept of my music video revolved around rain it meant that weather was a big issue which had to be overcome. I overestimated how willing I was to shoot in rainy conditions, it meant that a waterproof cover had to be used which made the camera much more difficult to focus and manoeuvre. As my camera isn't waterproof it meant that I had to decide whether to shoot in rainy conditions with bad filming quality or film on dry days which doesn't support the song as well. Eventually I decided that I would aim to shoot on dim, overcast days as this meant I could still retain the solemn mood whilst also keeping a reasonably high filming quality. Whilst this meant that the video was not as effective in portraying the mood I had intended, it avoided gear damage and too much poor filming. For shots filmed on brighter days I reduced the saturation, exposure and contrast in editing to try and maintain the dull mood. Another issue relevant to weather which had to be overcome was strong winds creating unstable footage. Despite trying my best to create stable filming conditions in the high winds by weighing down tripods and blocking the wind, much of the footage turned out shaky. Filming on a windy day meant that the sky was dramatic and how I wanted it to appear so the wind was just something that I had to work around. Along with trying to stabilise the camera when filming I also applied a 'warp stabiliser' effect in editing which made the footage notably less shaky. However there were cases where the shakiness of the footage actually proved to be effective in supporting the mood of the video and representing the character's unstable mindset (in these cases I did not apply the stabilising effect.) 

With every scene there was always the risk of damaging equipment however I always ensured that all gear was mounted firmly and was securely placed on level terrain. If there was nowhere for the tripod to be set up in a stable position we would simply move to a location where there was level terrain. When shooting on the moors, wet weather could've made the ground very slippery and dangerous for both the gear and the crew so we purposefully avoided shooting this location on a wet day.  

The main visual issues which I encountered when filming were relevant to lighting conditions and this was something which I had to try and overcome in the editing process. Especially in the house location you can see that the auto white balance feature in the camera was unsuccessful in producing accurate tones. This error was due to me not using manual white balance settings as I relied on the camera's auto feature which had been accurate in most other scenes. In my opinion, my failure to correctly monitor the white balance in this one scene hindered the entire music video - taking away further professionalism and continuity. As I only noticed this issue after shooting it meant that I had to try and overcome it using the white balance control in editing however this was unsuccessful as the video was not shot on 'raw' which allows you to perfectly change WB after. For this reason I prefer the black and white version of the music video as each shot flows into the next better without the colours clashing or looking unprofessional. 

Adapting ideas and video to COVID restrictions 

I feel that I was lucky when it came to problems created by covid restrictions when filming my music video as the timing seemed to work out well as well as the plan itself. As I was only filming with one actor it meant that in 2020 when we were filming our video the restrictions allowed for us to film. For the majority of the filming period you were allowed to meet with 1 other person from a different household in outdoor public spaces - this was fine as it meant that we were able to continue filming all of the outdoor scenes. At the very start and then also close to Christmas the restrictions were slightly more permitting and we were able to film the two indoor scenes however these were only small time periods and when it came to reviewing the footage in 2021 I wasn't able to go back and improve any of the scenes as we weren't even allowed to mix with people outdoors. I would have definitely improved the indoor scenes (using more controlled lighting and a less cluttered, more identifiable mis-en-scene.) I would have also liked to improve the scenes shot in Leeds as they were very shaky, underexposed and un-controlled however I was unable to do this. Obviously restrictions such as distancing, wearing masks etc. were followed however this didn't really affect the quality at which I could create my video as I wasn't intending on being super close to the actor anyway or filming him on public transport. In 2021 when we were unable to mix at all I used my time to collect all of the B-roll I could in my local area such as the river or traffic time-lapses. 

As I've said the only issues which COVID created in altering the plan of creating my music video were in taking away the ability to go back and improve on shots which I wasn't happy with. This meant that I had to adapt my production process to be pretty heavily based on editing - trying my best to improve how my shots looked through altering colours and using special effects. Whilst this wasn't ideal it was much less drastic than the alterations others had to make to their videos and taught me that I need to have more control over my shots when I'm physically taking them (monitoring lighting, WB etc.) In addition, this heavy editing aspect meant that I was able to improve my editing skills and outline every area in which I need to improve for the next project. 

Were deadlines successfully met and how well did I stick to my plans

Even though the restrictions prevented us from filming certain scenes at times I was still successful in meeting the deadlines and felt that I was on track at all times in the production process. Whilst I met all of the filming and editing deadlines set by my teacher without the need of any extensions, there were cases where I was unsuccessful in meeting the deadlines I set for myself for a number of reasons. As I've mentioned the pandemic prevented me from shooting certain scenes at times however I tried to organise my shooting in a way where if I was unable to shoot one scene I would go and shoot something else to make sure my project was always progressing. For example, if the restrictions prevented me from filming the actor then I would rearrange my plan so that I could instead shoot B-Roll. Another factor that impacted my ability to meet deadlines set by myself was the availability of the actor on a planned day however this was easily worked around by arranging another date when best suitable. The weather also affected how able I was to stick to my plans as a sunny day meant I couldn't shoot. However, as I mentioned earlier I had to make a compromise between weather and filming quality which increased the amount of days on which I could film - helping me stick to the timeframes. Despite minor delays and subtle re-scheduling I feel like I was quite successful in following my plan time-wise and never felt as if I was behind or needed to catch up. 

Whilst I felt like I was meeting my plan in terms of time, there were downfalls visually that meant I strayed further than I would've liked from my intended look. On a wider scale I would say that I would've liked my video to look cleaner and more professional - with less cluttered mis-en-scene, smoother camera movement and more continuous lighting conditions. Although I tried my best to overcome some of the imperfections in editing the video still doesn't live up to how I had planned or the image I had in my head. In normal conditions I would've completed filming well before the deadline which would have allowed me to review the footage, see what I need to improve, and re-do the shots I wasn't happy with (however restrictions denied this opportunity.) For example, I would have definitely re shot the house scenes due to my white balance mistake and what was an under-lit and overcluttered setting (despite me thinking this is what worked for the video.) I probably should have shot all of the scenes in rain like I had planned because this would've supported the mood and meaning of the song a lot better and made the video more effective - figure out a way to shoot in rain without hindering quality. 

Even though this video didn't appear visually how I wanted it to, I don't think it was completely ineffective as it still supported the feelings I wanted it to and retained attention fairly well. I much prefer the black and white version due to the continuity between scenes and more emotive overtones - I think it outlines the mood of the song better and makes imperfections less noticeable. I probably could have heightened the motif of rain by using some non-diegetic rain sound effects in places and some b-roll/overlays of rain. 

Exporting formats 

In my M1 Distribution and marketing post I outlined that this music video would be exported as a high bitrate .MP4 file with  H.264 codec to make it better optimised for upload to sites like YouTube, Vimeo and Facebook because they compress the files on upload. This compression wasn't too noticeable as the average viewer doesn't watch music videos in a critical sense - there's not much producers can do about this anyway. This video was filmed and exported at a resolution of 1920 x 1080p but was just cropped visually to create the 4:3 aspect ratio look. This resolution, whilst not being incredibly high like 4k is still HD and there is little to no pixilation - just a lack of clarity in some shots. In my plan I stated that I wanted to reduce the frame rate from 25fps to 18fps in order to emphasise the retro feel however when it came to editing this effect appeared more annoying than nostalgic so I left the frames per second at 25. Overall I think the export decisions were successful and I wouldn't have changed them as they were as good as possible for the quality of the footage. 


Friday, February 12, 2021

M3 Codes and Conventions of my music video

Song, Artist and Genre 
The song, "Solstice" was released in 2018 by Yeek - a multimedia artist based in New jersey, USA. It has minimal layers and a monotonous chorus to reflect the artist's mood and feeling about the focus, rain. Yeek has a very strong brand identity and rarely releases new music whilst still retaining a fairly large following. In addition to creating music he also directs and features in his own music videos alongside creating artwork. His iconography is often strengthened in his music videos by abstract concepts, unusual effects and multimedia influence such as animation. 'Dream pop' songs tend to have a strong sense of minimalism and atmosphere which lends itself well to a concept style video however can be very uninteresting to a listener. It has been slowly emerging since its birth from the neo-psychedelic rock genre in the 80s but is still dominated by smaller artists compared to more widely recognised genres. 
Personally I'm not a fan of the song or the 'dream pop' genre however I purposefully chose a song and genre I wasn't interested in for two reasons. The main reason I did this was to challenge myself, in real life there's a high chance that I would have to make a video for a song I didn't like. Furthermore the idea of rain which the song focusses on is something I have avoided looking at creatively for the 5 years I've been taking pictures and making videos so this increased the challenge for me. The second and less significant reason why I chose a bad song instead of one personal to me was so that the process of filming and editing a video wouldn't ruin a song that was special to me. In my experience the repetitive process of filming and editing using a song often ruins that song for me. 

Style of Music video 
As outlined in my M1 Justification of context post I chose to create a concept style music video. Although some dream pop videos are performance based there is always an underlying conceptual element which could even be seen in camera movement, motion graphics or special effects. Furthermore, the artist himself creates primarily concept style music videos so I felt that this style would best support his brand. For example in his 'only in the west' music video he used strange conceptual shots ranging from a mattress in the ocean to a face in a fish bowl to reference the effects of drug use - the focus of the song. This research led me to creating a concept style video with some unusual shot types and special effects in an attempt to support the artist's brand identity and add to the focus of rain. 
 
Shooting to adhere with genre conventions
Typically music videos in this genre feature a surplus of wide and extreme wide shots to represent isolation and solidarity. In alignment with this genre convention I used many wide shots in my video for the same purpose.
Some of these wide shots included the actor and some were just of a stagnant scene however I felt it was crucial to include them as the song also has a very empty and deserted feel to it and therefore the visuals support the song. In addition special effects tend to be a key convention of music videos in this genre so I had to shoot with post production in mind. By this I mean that I shot scenes in ways that would make the editing process cleaner and easier when creating special effects ie. shooting on a tripod, collecting base shots etc. I shot many of the scenes from an eye-level angle which contrasted the purposeful absence of a close-up shot of the actor - this meant that although the audience felt on the same level as the actor they never got too close to him which represents the isolation felt by the character.
The only close up shot of the actor occurred when taking drugs which is symbolic of how the character feels more open and less solidary when intoxicated.
As mentioned, I chose to focus on rain in song choice and music video concept as a way to challenge myself which meant that shots taken in rain would be more effective. When shooting I tried to shoot in rain as much as possible to support the pathetic fallacy theme we see across Dream Pop videos however I didn't shoot in rain as much as planned. This was mainly because I would have to use a waterproof plastic cover for my camera to avoid gear damage which led to shaky and blurry footage which I am unhappy with. In terms of camera movement I wanted to primarily use stationary/ tripod shots s this emphasised the feeling that the character was alone and that us, as the audience were just observing. Obviously I did use some soft pan and tilt movements to diversify the video in an attempt to retain viewer attention however this was normally when the actor was entering or leaving a scene. I wanted to shoot in dark and under-exposed lighting conditions to support the solemn mood of the song and concept which often meant either shooting on dark and overcast days or using little external lighting indoors.
Having dark indoor scenes often meant that there was quite a lot of noise on the image however as I wanted the poor camera quality/vintage look this was not necessarily a negative thing. However the lack of artificial lighting meant that many of the indoor scenes appeared very yellow and warm as I didn't combat the incandescent lighting with my cameras manual white balance. This created a very unprofessional look and meant that there was a lack of continuity between scenes which I regret. In terms of mis-en-scene I followed my plan fairly well despite not shooting in rain as much as I thought. I shot time-lapses of traffic, weather and people like intended as well as the actor at different locations. His house where stationary shots of chess, TV, cards and smoking represented boredom.
The moors where wide shots of him walking through landscapes represented isolation and the church which supported the holy connotations of rain as well as representing the search for something more. Besides these main scenes I also shot a lot of supporting B-roll from different location, ranging from buildings in London to the river here in Ilkley. All of these B-roll shots supported the theme of rain and followed the same dark and gloomy look. 

Editing to support genre conventions 
Post production was where I tried to both emphasise the genre conventions that I didn't adhere to properly when shooting as well as follow editing genre conventions the other videos feature. Some of the shots I took weren't shot on rainy or dull days so I had to decrease the saturation and exposure of these shots to mirror a miserable day to add continuity - not only following the mood of the song but also the concept of the video. To add to the continuity of the video I altered the colour properties of every shot using the colour wheels and sliders to try and make each scene look more similar. Most Dream pop music videos feature unique special effects so I felt that I should also include some special effects in my video to adhere to this convention. The most notable effect I created when editing was the duplication effect where the actor appeared multiple times harmoniously in the same scene. This was to symbolise rain and I felt that it helped to draw viewer attention as well as differentiate the video from others which supports the artist's iconography.
In addition to this, another notable special effect which I created made time-lapse videos look like long-exposure photographs - this faded and hollow look showed time passing in a more retrospective and permanent way.
At the end of the video I made the actor fade out of the scene through alteration in opacity which I purposefully meant to be interpreted in different ways (Stuart Hall's theory,)
 it can be interpreted as death/suicide or evaporation (following the raindrop theme created by the opening scene.).
There were some general effects which I added to all of the shots in the music video to not only add continuity but also adhere to specific genre conventions. Videos from this genre tend to play on nostalgia and almost stick to their roots of the 90s either through the use of retro mis-en-scene or special effects. As I didn't have the budget to effectively have the mis-en-scene be nostalgic I took the post production route to attain this outcome. This meant cropping the entire project by 14% on both sides to create the 4:3 aspect ratio typically associated with music videos and VHS cameras. I could have filmed on VHS to make this fully authentic however this would have been way more time consuming and the artist lends more towards HD videos as opposed to 480p. Alongside the 4:3 aspect ratio I also applied a faded film look to support the vintage feel.
There were some less noticeable special effects used in my video such as the distorted edges and jump cutting, 
 for more detail on how I created every single effect in my video you can see my P5 Editing and Post production post. All of the effects were to support the genre convention of different visual imagery and support the ideas in this concept video of rain, depression, loneliness and drug use. Only two logos/title frames were used in this video to emphasise the artist's brand identity, featuring his logo on a black screen at the end and the song's title/logo at the start.
I mainly used simple cut transitions and sequencing on beat in this video as it meant that the shots weren't too intrusive and the audience felt distanced from the character like he does from everyone else however when the contrast between shots was too much, like from the smoking scene to the night shots in Leeds, I had to use more powerful transitions such as the 'luma fade' which blended shots better.
I didn't use much external audio in this video besides some diegetic sound nearer the start to ease the audience in - later on in the video it would have been a distraction. 

Links to theories 
Andrew Goodwin's theory: 
The American theorist stated that there were 7 observable characteristics across all music videos. I'll be seeing if these characteristics applied to my music video. The first key characteristic states that there is a relationship between lyrics and visuals; this is clearly evident in the overall concept of my music video - focussing on rain as the song does. The second key characteristic outlines a relationship between the instrumentals and visuals which I also followed by cutting between shots on beat, jump-cuts on beat and zoom in camera movements on beat. The third key characteristic states that genres typically have their own styles and conventions which we know to be true by the previous segment of this post - I feel that my music video did adhere to some genre conventions. Goodwin stated in his 4th characteristic that their is typically a demand from the record label for some close-up shots of the artist performing however my video does not fit this statement as I didn't have access to filming the artist and it isn't performance based anyway. I believe that this video does align with/ develop the artist's iconography which they develop inside and outside of their videos (5th characteristic.) I unfortunately didn't follow the sixth characteristic which states that there is typically a reference to voyeurism (frame within a frame.) The seventh and final characteristic says that there is usually some direct or indirect intertextual references in most music videos, in my video I directly referenced "The queen's gambit" through demonstration of chess - it is popular Netflix show orientating around chess.  

Bulmer and Katz's uses and gratification theory: 
This theory was a popular approach to understanding the mass media consumer and states that there are 4 reasons why people consume different pieces of media.  The first states that people consume media for the purpose of escapism/diversion - the thrill of pure entertainment to help them avoid thinking about what could be playing on their minds and worrying them. I don't feel that my music video was faced paced enough or entertaining enough to support this means of consumption and neither is the song. I also don't feel like people would watch my music video for the purpose of surveillance or to relate to personal relationships as the artist isn't featured in this video neither is human relation - instead a lack of human relationship is outlined in this video which means the consumer would gain no information to progress their own relationships. Instead I feel like the theme and concept of loneliness outlined in this video is something for consumers to identify with and relate to (3rd reason.) I think that the viewer could identify with the producer's concept and the characters identity created in the video. The feeling of isolation is something that is very relatable in today's current social climate which makes me think this would be the main reason for watching my music video as this is a key idea it looks at.  

Stuart Hall's theory:
His reception theory asserts that media texts are encoded and decoded. The producer of the music video will encode their ideas, values and ideologies into the media and then the consumer will decode the media - different audiences will decode the message in different ways. There are 3 ways in which audiences can decode a message. The first is referred to as dominant or preferred reading which is when the audience decodes the message in the way the producer intended. The second is known as oppositional reading, where the audience rejects the preferred reading and creates their own meaning for the text. The third and final way is negotiated reading - where there is a compromise between dominant and oppositional reading (the audience accepts part of the producer's ideologies but also has their own.) For me, ideally I would like the audience to decode the video with a negotiated reading as I wanted the video to leave a lot of room for interpretation whilst my ideas still being fairly clear. I think that the target audience for this video being younger and culturally diverse helps to steer the decoding in a negotiated way as they are more open to different views but also have the experience and capacity to interpret how they want to.  

Effects Theory: 
'The Effects Model' (backed up by the Bobo Doll experiment) is still the main theory used by politicians, some parts of the media and some religious organisations in attributing violence to the consumption of media texts. One example of this was the influence from 'Child's Play 3' in the murder of James Bulger (1993). In some cases laws are changed, media is banned etc. However in each case it was found that no case could have been proven to show a link between the text and the violent actions. I don't feel that my video promotes violence in any way as there isn't any violence or public antisocial behaviour featured. There is a quick scene which portrays the character as an underage drug user however I feel that the video doesn't promote this behaviour or make it appear 'cool'. Instead some consequences are shown through the symbolism of the wide and lonely shots as well as the fading away at the end. 

Wednesday, February 3, 2021

P5 Editing and Post-Production

Here is the 'offline' edit of my music video. This shows all of the clips I will use in my video in the order they will be in and for how long they will last. No editing to the visuals or audio has been done as this is just to give you an idea of the clips that will be used and when they will be used. The final edit will look completely different but now when it comes to doing that final edit I won't have to lay out all the clips. The only tools I used in Premiere Pro for this edit where the cut and drag tools as well as a bit of speeding up for the timelapsed clips - and that's it. (No effects, sound design, graphics etc.) 2 Hours

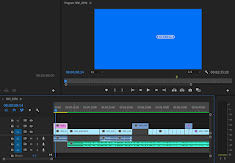
This is the timeline for the offline edit. As you can see it is quite basic, with a single green audio track at the bottom (song.) Where I have stacked clips (blue) it means only the top clip is visible. This was when I decided to replace a clip but instead of removing the clip I was replacing I instead left it underneath in-case I decide to go back to using it. Final edit is at the bottom of this post (this will be my longest post ever) 

Editing Process

OVERALL ADJUSTMENT LAYER: 3 Mins 
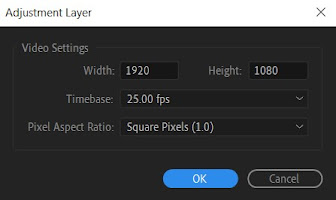
To create the more nostalgic look I created an adjustment layer which overlays the whole project. To this adjustment layer I cropped the left and right sides by 14% which means the whole project is cropped by this much which creates the older camera feel (aspect ratio 4:3.) In addition I slightly added the faded film effect to this adjustment layer to emphasise the nostalgic feel. I was also going to posterise/reduce the frame rate to 18fps for the whole project to really resemble an old camera however it made the video more annoying to watch so I left it at 30fps. 


SHOT 1 - 47 mins 
1.Firstly I downloaded the highest resolution image I could find of the single cover for this song 

2. Then I used the bucket fill tool in photoshop and filled over the logo in white. I was originally going to make the logo a vector however it was too pixelated so I had to go with this option which didn't get the cleanest result but ideally I would've got the high resolution logo from the artist. 
3. I then used the magic wand selection tool and erase tool to erase everything around the logo. Underneath the logo layer in photoshop was a solid blue colour matte. Once I had erased the pixels around the logo I used the screen blending mode to make the black inside of the logo appear transparent. 
4. I then imported the file into my video editing software on top of the clip it will be overplayed on. Once the logo was central I applied the ultra key effect which allowed me to remove all of the blue, leaving just the logo. 
5. Then I made the shot and logo 1-2 seconds longer as it worked better 
6. Next I added a new adjustment layer above the two video tracks where I did some basic colour grading to make the shot look colder, greener, more miserable and less saturated. 
7. Harsh cut transition to next shot 

SHOT 2 - 38 Mins
1. Firstly I stacked all of the clips of the actor in different positions in the frame on top of each other in the order that I wanted them to appear. 
2. I made the bottom layer a bit slower so that it would occupy the whole timeslot between shot 1 and shot 2. Speed to 93%. 
3. I then used opacity keyframes on all layers except the bottom (base layer) to fade in the actor in the different positions he was in (mimicking raindrops.) To allow all of the different subjects to appear on screen together I used elliptical masks around each person with a big feather value (blend the skies,) to sort of 'cut them out.' 
4. Next I 'nested' all of the stacked clips so that I could edit them as one clip. Using the scale tool I then created a zoom in movement which started on the beat drop by key framing and animating the scale property. 
5. I then created an adjustment layer over the top of the nested sequence and did some basic colour grading. Decreasing the highlights and increasing the shadows to increase the contrast and in turn moodiness of the shot. 
6. To finish off the clip I then created an adjustment layer placed between this shot and the next. To this layer I applied a pre-made 'luma fade' transition which basically just blends the highlights of the two clips. I needed to use a striking transition like this because the shots were very very different. 

SHOT 3 - 5 mins 
1. Initially I made a slight cut to the clip at the start so that the diegetic audio matched the beat of the song.
2. After that I then used the rotation and scale tools to make the clip look more level and therefore more professional. 
3. Next I did some basic colour adjustment. Making the clip warmer, greener and a bit more contrasting so that it matched the colour (as best as possible,) to the previous shot. This adds more continuity to the video. 

SHOT 4 - 10 mins
1. I slightly trimmed the start of the clip so that it matched the beat 
2. I then made small colour adjustments to make it match better with the previous clip and give it a more professional look however this was difficult due to the poor lighting conditions and varying white balance. 
3. As there was some background noise between the diegetic audio peaks I used alt + the cut tool to remove the audio track between the main peaks. 
4. After this I added an adjustment layer between this shot and the next and applied a warp transition which I downloaded online to the layer. This made the transition smoother as the mis-en-scene was quite different. 


 SHOT 5 (all jump cut shots in living room) - 3 mins
1. I was happy with the framing of the shots and the timing of the jump cuts created through the use of the cut tool. This meant that all I needed to do to these clips was add an adjustment layer which overlaid them so that I could alter the colours and exposure. Decreasing the highlights, increasing the shadows and making it colder WB. 

 SHOTS 6 AND 7 - 0 mins 
I was happy with how these shots looked and with the timing of the harsh cuts between them so I didn't alter them at all - did all that was needed in the offline edit. 

SHOT 8 - 7 mins 
1. Firstly I used the cut tool the cut the clip into two separate clips on the hit of the beat. 
2. I then reversed speed on the second clip so that the movement would be backwards in the video. 
3. After that I created an adjustment layer which overlaid the normal and reversed clips so that I could alter the contrast and saturation to make it more 'moody' as well as scale the shot in so that the river bank was cut out. 

SHOT 9 - 25 mins 
1. I started by creating a black colour matte which would be overlaid to make the video black for a split second - matching the hit of the claps. I used the cut tools to match the black screen to the length between the two claps and some markers to indicate to me on the timeline where these claps were. The black label can be seen here labelled in brown. 
2. I then highlighted and imported the actor in different positions and stacked the clips on top of each other in the order I wanted them (like in shot 2.) 
3. Following the method of shot 2 I used keyframes with the opacity effect control to fade in the different layers (leaving the bottom layer as a base.) The elliptical mask tool was used to cut out the actor in these different positions so that they could all appear in the same frame.   


4. I then repeated the black colour matte clap effect from the start of the clip to transition this shot and shot 10 (next.) In addition to the black screen I also added a quick zoom out transition which I downloaded online to the end of the clip. 
5. Finally, an adjustment layer was created and placed over this shot so that I could alter the colours and exposure curves. Making the shot more cohesive with the rest of the video in terms of colour and contrast.  

SHOT 10 - 0 mins 
I was happy with how this shot looked so I left it how it was 

SHOT 11 - 3 mins
1. Originally I was going to use the crop tool to have the actor in frame twice (playing chess against himself.) However I decided to leave it as a jump-cut because it better represents solitude and isolation. Furthermore it could be confusing for the viewer if they don't recognise that it is the same person which would kill the meaning of the video. 
2. This meant that the only editing I did to these chess clips was adding an adjustment layer over the top of them and doing some basic colour and exposure correction. Making it colder in the mid tones and increasing the highlights to make the shot look cleaner and a bit better exposed. 

SHOT 12 - 5 mins 
1. There was not much that needed to be done to this shot in terms of movement or special effects despite some slight colour adjustment to make it look more professional and cohesive with the other clips. However instead of manually altering all the colours I used a colour preset which I downloaded from the internet. This preset obviously doesn't work on all clips but it saves time and looks good on some of them. It was a little bit too intense though so I reduced the intensity by 50%.  
2. Similar to the transition between shot 2 and shot 3 I added a 'luma fade' transition between this shot and the next. I did this because there was quite a large contrast between the two scenes due to lighting and angles. A luma fade basically just merges the highlights of both clips into black. 

SHOT 13 - 5 mins
1. I added the same colour preset to this clip as I did in the previous clip as it saves time, adds continuity and worked well on this clip. 
2. I wanted a transition from this clip that was smooth but also enough to mask the change in angle and mis-en-scene from the high angle of lighting the joint to the low angle of smoking it. A quick zoom out transition which I downloaded online was applied to the end of the clip. 

SHOTS 14 AND 15 -
90 mins
1. Firstly I cut shot 14 in half on beat and made the second half 50% speed.
2. After this I colour graded the clip with the online colour preset. 
3. Next I used the 'I' and 'O' keys to select just shot 14 and export it to a memory stick. 
4. Then I moved on to editing shot 15. Firstly I stabilised it using the warp stabiliser effect in Premiere Pro. 
5. After that I wanted to create the glow effect with this clip so I placed an adjustment layer over it so that I could add my effects to it. Next I added the gaussian blur effect to the adjustment layer and set the blur value to 37.0. After that I set the opacity blend mode to 'linear dodge (add)' which created the glowing lights effect. The glow was too bright so I set the opacity of the adjustment layer to 25%. 
6. Next I used 'I' and 'O' to export shot 15 onto the memory stick. 
7. This memory stick was then inserted into my old and extremely sluggish PC where I had the software necessary to create the effect I desired (datamosh studio.)
8. Once I had created a new project in 'datamosh studio' I had to import shot 14 and shot 15 into the software. After that I had to alter the 'i-frames' and render the footage which took lots of painful trial and error.  


9. Unfortunately, after all of that effort the transition did not look how I desired due to a lack of movement in the shots so I decided to use the usual luma fade transition that I had been using previously.  
This is how the failed transition looks (you can see why it didn't work out): 


SHOT 16 - 7 mins
1. I copied and pasted the adjustment layer from shot 15 over the top of this shot to create the dreamy glow effect. 
2. The shot was a bit dark compared to the ones that surrounded it so I increased the exposure slightly. 
4. The shot didn't appear to be level so I used the rotation and scale effect controls to level it out and make it look more professional. 
5. Finally I added the fast zoom out transition which I downloaded off of the internet to the end of the shot. 

SHOT 17 - 3 mins 
1. I created an adjustment layer above the shot and applied a colour preset to make the shot bluer and more cohesive with the other shots. (+saves time)
2. The clip was a little bit too shaky so I added the warp stabiliser effect to smoothen the movement. 

SHOT 18 - 3 mins 
1. I started by using the rotation and scale controls to make the clip appear more level and therefore more professional.  
2. Like the previous shot I applied a colour preset to speed up the process and add tonal continuity. 

SHOT 19 - 30 mins 
1. Firstly I colour corrected the clip using a preset I downloaded from the internet as this saved time and looked good. The shot was too bright so I reduced the exposure by 0.9. 

2. After that I exported this shot from Premiere Pro (main editing software) and imported it into After Effects (special effects.) 
3. Then inside of after effects I copy and pasted the shot around 50 times and stacked each duplicated clip on top of the last. Each duplicated clip was placed 1 frame in front of the previous clip which creates the lag/ long exposure effect. 
4. Once I had done this for the entire duration of the original shot I selected all of the clips besides the bottom clip and pressed 'T' which meant I could alter their properties as one clip. 
5. I set the opacity of all the clips to 5% as this meant that all of the clips were visible on frame with the kind of ghosted look. 
6. Finally I exported the clip from After effects back into Premiere Pro where it replaced the unedited shot. (edited shot in tan colour.)

SHOT 20 - 10 mins 
1. Firstly I duplicated the shot and placed the duplicate clip half a second behind the original. 
2. After that I animated an elliptical opacity mask on the duplicate layer which allowed me to cut out the actor in a different position and have it appear on frame that there are two of him.  

3. Finally I created an adjustment layer which meant that I could simultaneously alter the colours of both these layers. On this adj layer I increased the contrast, decreased the shadows, decreased the highlights and made the WB colder. 

SHOT 21 - 1 minute 
1. I used the warp stabiliser effect to make the handheld movement in the shot smoother. 

SHOT 22 - 2 mins 
1. I added a colour preset as it looked good on the clip and saved time whilst adding continuity. 

SHOT 23 - 3 mins 
1. Just like the previous shot I added the same colour preset for the same reasons. 
2. Next I created a black colour matte which would temporarily make the shot black to match the duration of the snares. This acted as a nice and simple transition. 

SHOTS 24 AND 25 - 1 min 
1. As both of these clips had very similar tonal qualities I created an adjustment layer which covered both of them, allowing me to apply a colour preset to both of them at one time. 


SHOT 26 - 5 mins 
1. Shot 26 is every shot of the card game scene from the same central angle. Instead of having the actor appear twice on frame I used the cut tool to create a jump cut as this better represented solitude and matched better with the beat of the song. 

2. As this shot had exactly the same lighting and mis-en-scene as shot 11 I copied and pasted the adjustment layer from that shot and added it above this one. This meant that the same colour grading was applied. 

SHOT 27 -
5 mins 
1. I used the position tool to centralise the chess board in frame. Moved shot to the left -60.0 people. 
2. I then created  a new adjustment layer and increased the contrast of the clip to make it appear 'moodier'. 

SHOT 28 - 5 mins
1. To make the clip level in an attempt to make it appear more professional I rotated it by +2°.
2. I applied a colour preset to the clip as it looked better, added continuity and saved time. 

SHOTS 29, 30 AND 31 - 30 mins 
1. I increased the speed accordingly for each clip so that it fit in the time slot that I marked out in relativity to the beat. For example I increased the speed of shot 30 to 5000%. 
2. I then created an adjustment layer which overlaid all 3 shots so that I could colour grade all 3 shots at once using the same colour preset. This added continuity. 
3. The exposure in shot 30 was fine however shot 29 and 31 were too dark so I used the cut tool to divide the colour adjustment layer. I accordingly reduced the exposure of the layers which altered 29 and 31. 
4. After that I decided to create a blurred edge effect instead of 'tilt-shift' like I planned because I knew how to execute it better and it adds a similar feel. This effect is achieved by first creating a new adjustment layer over all 3 shots (labelled in lime green) and then adding the 'VR digital glitch' effect to it. 'Geometry distortion X' set to 0 (-50.) 'Distortion complexity' to 1 (-39.) Distortion rate to 0 (-50.) 

5. I then used an inverted elliptical mask with a large feather value (250) so that the glitch effect only affected the edges of the shot.  
6. To the same (green) adjustment layer I added a lens distortion effect with a -9 curvature to make the shots look more surreal. 
7. Above the green adjustment layer I created a new adjustment layer (this time labelled in orange.) This was because I needed a layer to add to which had not been altered by any other effects. To this new layer I added a 'fast blur' effect set to 16.0 to make the mis-en-scene seem more surreal and miniature. To ensure that the effect only affected the edge on the frame I used a feathered elliptical mask. 

SHOT 32, 33 AND 34 - 0 mins 
1. I didn't alter these clips at all from the offline edit, just using the cut tool to create harsh, timed transitions. 

SHOT 35,36 AND 37 - 10 mins
1. The colours and exposures were all fine throughout these 3 shots so I left them how they were and instead increased the speed of each clip accordingly so it fit the beat. Shot 35 5000% speed, Shot 36 4000% speed, Shot 37 2000% speed. Time-lapse look. 

SHOT 38 - 20 mins 
1. Firstly I exported the clip from my main editing software into After effects to make SFX easier. 

2. Once in After Effects I duplicated the shot, each time one frame in-front of the other which creates the lag/ long exposure effect. 
3. I then selected all of the duplicated clips besides the bottom (base) one and pressed 'T' which meant I could lower the opacity of all of them by 5%. 

4. The shot was then exported from After effects into my main editing software where it replaced the un-edited shot. (labelled in tan.) 

SHOT 39 - 1 min 
1. The only alteration I did to this clip was an 8000% increase in speed to create the time-lapse effect. 

SHOT 40 - 20 mins
1. I started by creating an adjustment layer above the shot which allowed me to do some basic colour correction as well as lower the whites and decrease the highlights to make the shot seem more miserable.


2. I exported this shot from Premiere (main) into After effects (special effects based.)


3. In After effects I created a new composition from the shot and duplicated it, each time placing it 1 frame in-front of the previous one. Creating the lag effect.
4. I then selected all of the clips besides the bottom one and changed the opacity of them to 5% which created the long-exposure effect. 
5. Next I exported the clip from After effects into premiere where it replaced the un-edited version. (labelled in tan.) 

SHOT 41- 2 mins 
1. I actually quite liked the shakiness of the clip so I decided to leave it how it was (sped up.) Then I just did some basic colour grading. Decreasing the highlights and slightly increasing the temperature. 

SHOT 42 - 10 mins 
1. Firstly I added a base layer (shot of the scene without Will in,) which meant that when Will faded out the screen did not fade to black. This base layer is labelled in green. 
2. Then on the top layer (with Will in) I keyframed the opacity to reduce so that it appeared Will was fading away whilst the background stayed the same. 


End graphic - Once the video cut to black I downloaded the artist's logo from the internet and inverted. I then imported it into Premiere and used the cut and drag tools to have it appear when I wanted it to. 

Here is the final edit of the music video I created for 'YEEK - Solstice':

Here is the final timeline for this edit: 


I also made a black and white version to compare: 

Both the actor and myself prefer the black and white version as it feels more continuous both in tonal quality and mood. The colour version is still the main final edit is this is what I had planned.